Read this before building/updating your Lifecycle Stages in HubSpot…
I promise this won’t be one of those recipe-type articles where I tell you the back story behind what motivated me to be in MOPs, what lifecycle means to me, or the origin of lifecycle. Let’s just get straight to it. You’re likely here because you already know the value of having HubSpot lifecycle stages configured, and you probably have one of two options: you’re beginning to build it for the first time or optimize your current setup. But before doing so, let me share with you things I learned along the way to make the process easier for you.
-
HubSpot now allows you to delete default stages you don’t want
So long, Evangelist and Subscriber! Just kidding. Well, kinda. In my experience working with HubSpot I haven’t seen many businesses find value in these out-of-box lifecycle stages, and unfortunately we were stuck with them in the instance. It ultimately led to more confusion amongst stakeholders and more work required to combat the confusion.
While you could always add any custom lifecycle stages that were applicable to your business, you now have the ability to delete any of those stages you don’t want or that don’t apply to your business. This means you no longer need to have a workflow running in the background to update contacts that were created with that stage. Before deleting, though, you’ll just need to make sure no contacts are assigned to that stage and the stage isn’t being referenced elsewhere within the platform. A big win for clean freaks, like myself!
-
Keep track of lifecycle properties when you change an existing stage
If you don’t want to delete a default lifecycle stage, as mentioned in the scenario above, you can repurpose an existing default lifecycle stage to a new stage that works better for your business. However, it is essential you keep track of the properties tied to that previous lifecycle stage so you don’t end up with a webbed mess of properties.
When you repurpose the old lifecycle stage, the “Date entered” and “Date exited” properties for that stage will automatically be renamed to match the name of the new stage. Super helpful! However, the “Became a [stage] date” property will NOT be renamed, and it isn’t possible to rename it yourself. You might be fine with this if you’re only focused on the “Date entered” and “Date exited” properties, but it could result in some confusion down the road. My personal take when it comes to this whole scenario: delete any lifecycle stages you don’t want in your instance and create the necessary custom stages later, instead of repurposing an existing one. You’ll thank me later.
-
HubSpot will automatically populate “Date entered” and “Date exited” properties for each stage
This only applies if you have the Professional or Enterprise hub subscription, so make sure that’s actually the case before diving too deep into your strategy. If you are on one of those plans, though, there’s no need to remember to update a date property in a workflow when updating the lifecycle stage of a contact. HubSpot will do it for you with the “Date entered” and “Date exited” properties for each lifecycle stage. Additionally, from these pieces of information, HubSpot will also calculate the “Latest time in [stage]” and “Cumulative time in [stage]” properties, which help us identify how long a contact has been in a certain stage (a common question asked of us MOPs folks). This can help you identify bottlenecks and/or gaps within your sales process, which can ultimately drive more revenue for the business.
But there’s a catch. HubSpot will automatically calculate these values based on updates to the Lifecycle stage field, and there isn’t a way to make manual updates if needed. While a custom property could be cleared out and re-populated correctly, the “Date entered” and “Date exited” properties are only triggered off updates to the Lifecycle stage field. All of the sudden your minor mishap becomes a major issue with SLAs, reporting, and lead routing just to name a few.
So while errors won’t happen everyday, I think it’s important to at least be mindful of what options you do have when you find yourself in a sticky situation.
-
You must clear the Lifecycle stage property to move a contact “back” in the lifecycle model
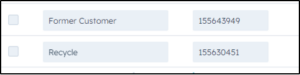
It’s not too uncommon, especially for larger enterprises that have long selling cycles: a contact will progress through your lifecycle model more than once. Your sales rep reached out to the prospect in January, but they weren’t quite ready to buy yet. All good. Now it’s July, and that same prospect finally has some budget and is ready to purchase. How do you go about tracking this in HubSpot, then?
Personally, while it feels like there could be a more straightforward solution out there, the answer isn’t too complicated. You’ll simply clear out the Lifecycle stage property value on the contact record and re-populate the field with the new stage value through workflow automation, versus simply updating the field. Just one more step in your workflow, but it’ll save you an afternoon of trying to figure out why your workflow didn’t properly run.
-
HubSpot has multiple properties to track when a contact entered a lifecycle stage
I briefly touched on the “Date entered” and “Date exited” properties above, but did you know there’s other properties, as well? Before these properties existed the “Became a [stage] date” was the only default property to track when contacts entered the corresponding lifecycle stage. The “Became a [stage] date” properties are still available in your HubSpot instance, but HubSpot is now recommending to use the newer properties for your tracking purposes. However, let me give you the skinny on the differences between the new and old properties so you can decide what works best for you and your team.
While both sets of properties are automatically calculated based on changes to your lifecycle stage property, a key difference is how they function when a contact moves “back” in your lifecycle model. When this happens, the “greater” lifecycle “Became a [stage] date” property will be cleared out, and the “lower” lifecycle “Became a [stage] date” property will be updated accordingly. On the other side of the coin with the “Date entered” and “Date exited” properties, the properties for the “higher” lifecycle stage will not be cleared out when the contact moves “back” in the lifecycle model. At the end of the day, it all comes down to how you and your business want to track re-progression through a lifecycle model. If historical data is important, primarily use the “Date entered” and “Date exited” properties. But if you just care more about the most recent progression through the lifecycle model, the “Became a [stage] date” properties will be your go-to.
Lifecycle Stage Became a “Recycled” Date Became a “Marketing Qualified Lead” Date Date Entered “Recycled” Date Exited “Recycled” Recycled Date of Activity [NULL] Date of Activity ↓ ↓ ↓ ↓ ↓ Marketing Qualified Lead [NULL] Date of Activity Date of Activity Date of Activity -
Make sure your lifecycle stage values are aligned between MAP & CRM
It might seem obvious, but it has its way of slipping past us. I’ll speak in Salesforce terms for the purposes of this article, but the same principle applies to other CRMs. If you sync your lifecycle stage field to SFDC (I recommend you do), then you need to make sure your picklist values are aligned across both person objects, leads and contacts. Be especially mindful that you are mapping the correct stage values in HubSpot to those in SFDC. It can be especially tricky for two reasons: 1) the picklist labels may differ from the internal name of the value, and 2) the internal name for a custom stage value displays in a series of numbers, which again may cause some confusion.
This usually comes into play when you are making enhancements to an existing model but can certainly apply when you are implementing a lifecycle model for the first time. When you try to make an update to the lifecycle stage in HubSpot, the sync for that record will break if the record doesn’t have an acceptable lifecycle stage value. And then, depending upon how your admin team may operate, the new picklist value may not be able to be added until the next sprint, delaying your project. So do the work upfront and make sure your SFDC field has the correct picklist values.
-
Be mindful of and clearly document any validation rules that reference your lifecycle stage in your CRM
This one hits a little too close to home and can be particularly frustrating if you don’t have the most insight into the back-end of your CRM. Years ago, maybe before you had even heard of your company, an admin may have built some validation rules that prevent certain picklist values from being selected on one field when another field is a certain value. This usually comes into play with the Lifecycle stage property and the Lead status property and causes the record to no longer sync to Salesforce. Can you think of a worse MOPs nightmare?
So before even building out or updating your lifecycle stage values and workflows in HubSpot, connect with your Admin team to uncover those pesky validation rules (or any other similar restrictions) and determine if they are still necessary. If they are still necessary, account for them in your build upfront versus putting out fire after fire later down the road.
-
Build reporting to monitor the volume of each lifecycle stage
We at Etumos have this acronym called “SCRIM.” It’s how we approach everything we do in Marketing Operations to ensure we deliver the best for our clients. For now, though, the “I” is what I want to focus on: Intelligent.
Things break; it’s just how life is. But we want to be the first to know when they break, how they broke, and how to go about fixing the issue so they don’t break again. That’s where reporting comes into play.
I recommend building out a report, or set of reports, in HubSpot to monitor the volume of contacts at each stage within your lifecycle model. Get a general sense of how many contacts are at each stage to understand when something feels “off”. That way you can quickly respond to the issue at hand and rectify it accordingly before there are any downstream impacts.
While there is certainly more than one way to go about maintaining a lifecycle model within your HubSpot instance, HubSpot provides us with some great best practices and documentation on how everything operates. I hope that, along with my personal findings and discoveries above, will help you and your team to build your best lifecycle model ever.
If you need help setting up your HubSpot lifecycle stages, let us know – we can help!