What’s the problem?
Have you ever been curious about how to implement a version of ‘global forms’ in the HubSpot Marketing Hub for content? We were too and did some testing to try to work through a solution. See below for what we found and wanted to share with you for review and possible implementation.
Ask any MOPs professional and most will answer that global forms provide way more benefit than single one off forms. In this use case, having one (1) global content form allows an organization to scale their efforts in the following way:
- Efficiently launch new content tracking
- Build one workflow triggered by single form with multiple decisions
- Standardize data capture within the form itself
- Leverage hidden UTM values for campaign tracking and ROI
Let’s get into the specifics!
Great, how do I implement this?
HubSpot Marketing Hub clients need the following to implement this solution:
- Personalized Automated Email(s)
- Create Custom properties and Update existing form(s) with hidden custom properties
- Workflow: Tag Latest Content Title and Send Autoresponder
Step 1: Create Automated Emails
Before you build your workflow, you will need to create an automated email in HubSpot to use in the workflow. This autoresponder email will include property tokens to make the email dynamic and update with custom information for that contact. Build an automated email for each asset that contains the personalized content title and link to download the asset.
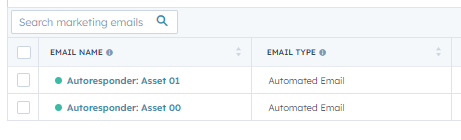
Each of these automated emails must include the personalized property value and the link to the asset:

Step 2: Create Custom Properties on the Contact Object
For our testing we implemented the following:
- utm_[property name]
- content_title
Add custom properties to form(s) as hidden properties. We recommend adding a default value for the hidden properties on the form to populate if there are no parameters present in the URL.
Here is an example of hidden properties on a form: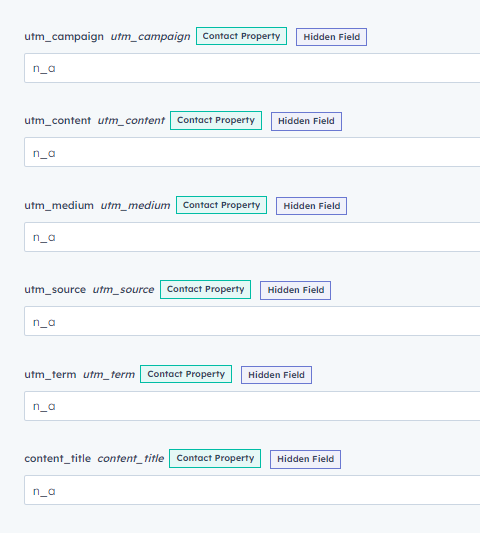
Content Title is added as a hidden property, please note this property could be any name that you require. This is just to show as an example. Ensure that ANY hidden property you want to pull from the UTM is the same name to capture upon conversion.
Pro tip: To capture a value with a space add a ‘%20’ in between the values after the parameter
Example URL: http://46038718.hs-sites.com/download-our-content?content_title=Content%20Asset%2000&utm_source=facebook&utm_medium=social&utm_campaign=content00&utm_term=info&utm_content=case_study
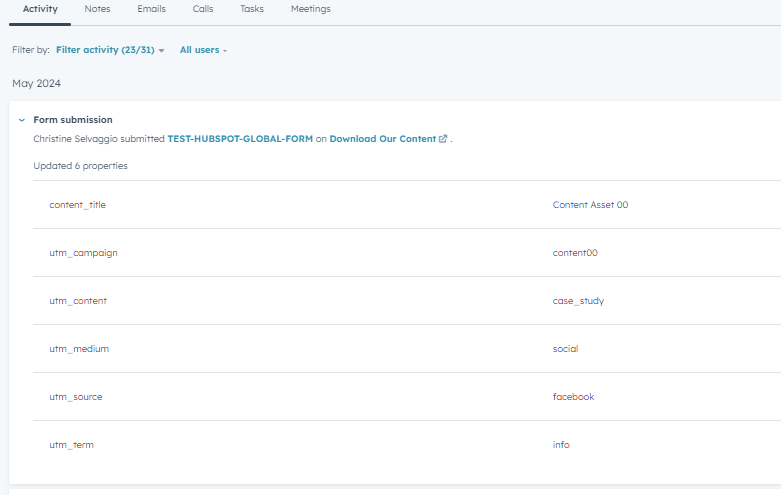
In the example URL, you see that the URL is appended with specific details:
- utm_source=facebook
- utm_medium=social
- utm_campaign=content
- utm_term=info
- utm_content=case_study
- content_title=Content Asset 20
When a contact converts on the form, the hidden fields will capture the information from the URL. Upon the conversion, the contact’s properties will be updated with the following:
Step 3: Build Workflow to Send Content Autoresponder
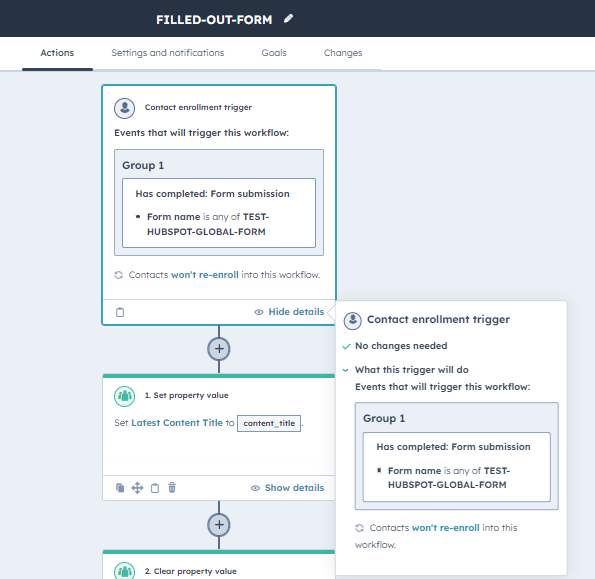
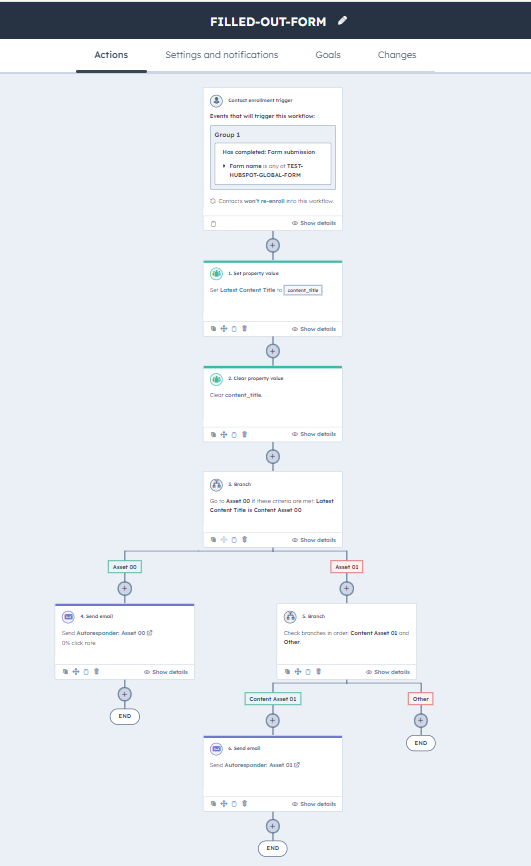
This workflow will trigger when a form fill takes place for the global content form. Once a contact enters into the workflow, branch logic will determine which page the most recent conversion took place. Once the automated emails are created, you can build the workflow to distribute these emails based on the content title. The workflow will require branch logic to decide which email to send.
Once the workflow is triggered, the workflow will populate the property ‘Latest Content Title’ with the value in the ‘content_title’ property that was populated during the conversion. The property ‘Latest Content Title’ is then used in a decision branch to determine which autoresponder to send.
The workflow will then use decision logic to determine with content to send:
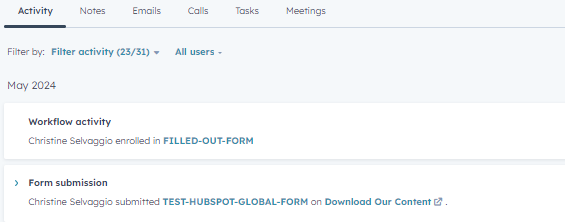
Autoresponder will show up as an activity on the contact’s activity log:

The final step is to NULL out the ‘content_title’ property in the workflow to allow for additional content engagement to take place and decision logic to determine which autoresponder to send.
With this method you can scale your content efforts!
Additional Workflow Steps
Sending an autoresponder email is just the first step. We encourage you to also consider additional workflow steps to process your contact data. Some ideas to consider include:
Salesforce Campaign Membership
Use this part of the workflow to decide which campaign in Salesforce to add the contact and which status to assign. This provides the ability to create/update a campaign member record in Salesforce and provide visibility to sales for engagement.
Pro tip: Take this a bit further and create custom campaign member fields to capture specific source or engagement data when the campaign member is created in Salesforce. These fields can be used in custom reports to understand which channels are driving engagement.
Nurture Membership
Once the contact processes through the workflow, we recommend thinking about adding the contact to a nurture campaign to continue nurturing the content based on the content engaged. Considering that you have preserved the content title, you can decide which nurture content to send as a follow up on a specified cadence.
Have fun implementing!
There you have it! Use this guide to implement a global form in HubSpot for content, including automating the autoresponder email, Salesforce campaign membership and continued nurture.