Overview
This is a quick guide on how to build a Salesforce flow to populate custom UTM fields on the campaign object. The Salesforce campaign object comes with default fields but sometimes those are just not enough to capture the information you need. Enter custom campaign object fields! You can create your own custom fields to stamp certain data when a campaign member record is created.
The value of doing this is the following:
- Reduces the amount of campaigns you need to build in Salesforce by capturing source specific data that drove the campaign member to engage with the offer
- Joins leads and contact data into a single Salesforce report by making the custom fields available in reports
- Understand which channels and tactics are driving the most engagement for an offer
In order to make this work, you will need to complete the following:
- Create a set of custom fields on the lead/contact object that will capture the field data and be used in the flow to populate the campaign member custom fields
- Create a set of custom fields on the campaign member object
- 1 flow with a decision tree to stamp the lead/contact field data into the custom campaign fields and then NULL out the values in order to reduce the risk of populating old data when a new campaign member is created for the same record
Let’s get into the specifics!
Step 1: Create Custom Fields on the Campaign Object
Navigate to Setup in Salesforce and click on object manager. Within the quick find box type campaign.

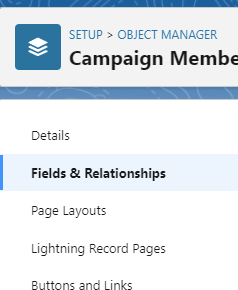
Click on the label: Campaign Member. This will bring up the details of that object. Click on ‘Fields & Relationships’ on the left side of the navigation bar.
This is where you will be creating your custom campaign member fields.
Before clicking ‘New’ and creating a bunch of fields, be sure to think through the following:
- Decide which Salesforce users should have visibility to these fields
- Which page layouts to add the fields
- Decide on what data you want to capture
- Field Naming Conventions
- Field Types
Before you create any custom fields, we recommend documenting all decisions within a shared resource for the team to understand when the changes were implemented.
Bonus tip: this resource can also be used for training!
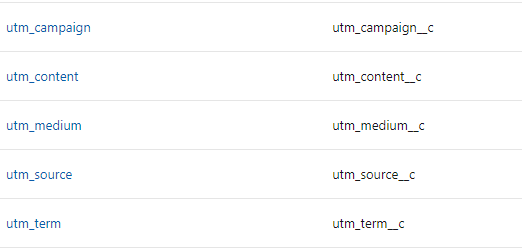 For the benefit of this example, we created five custom fields on the campaign member object to capture UTM values.
Let’s walk through how to do this and ensure these fields end up on the page layout and are available in reporting.
To create your new fields, click on the new button.

In the next window, decide which data type your field should be. For this example we chose text, so let’s choose that.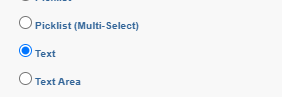
This click next. In the next screen you will input the specific information about your new field.
- Field Label: what the user will see on the page layout, make this friendly to humans
- Length: the maximum length for a text field, meaning the maximum number of characters and spaces allowed in the text field
- Field Name: internal reference of the field and used for integrations and APIs.
- Description: use this to make a note of why the field was created for your future self and users
- Help Text: This is a great place to add some detail for the users to hover over on the page layout
- Required: leave unchecked, if checked the record won’t save if the field is left blank
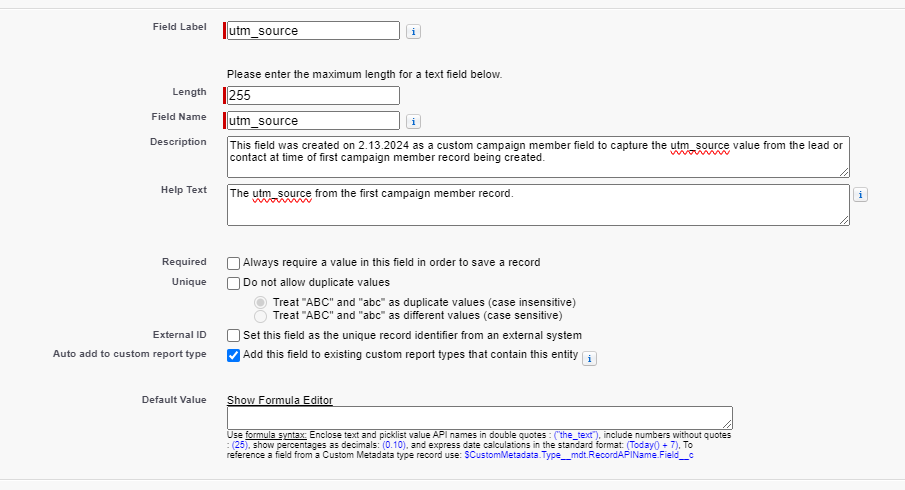
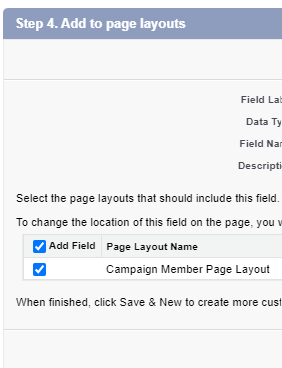
On the next page, choose which profiles or permission sets should have visibility to this field. Click next to choose which page layouts to add the fields. In our example instance we only have one page layout but if you have multiple then you need to check each of those layouts.
 Once you go through all of these steps, click the ‘save’ button if you are finished creating your fields or ‘save & new’ if you need to create more fields. Repeat the steps above for any other fields!
To confirm your fields are available, go back and click on the ‘Fields & Relationships’ link from the details navigation of the campaign member object and search for your field names.
Congratulations, you have created custom campaign member fields!
Step 2: Build a Salesforce Flow to Populate Your Custom Fields
Awesome, you have created your custom fields but how do we populate them? This is why we need a Salesforce flow.
What is a Salesforce flow, you may be asking? Salesforce Flow Builder allows users to automate all kinds of business processes without code! Meaning you don’t have to be a developer or write really complex programming language to make magic happen within your Salesforce environment.
New to flows? Here are some resources:
To create your flow, navigate to setup and type ‘flow’ in the quick find. Click on ‘Flows’ under ‘Process Automation’ and then click ‘New Flow’ to bring up the flow builder screen. This is where you will build your flow!
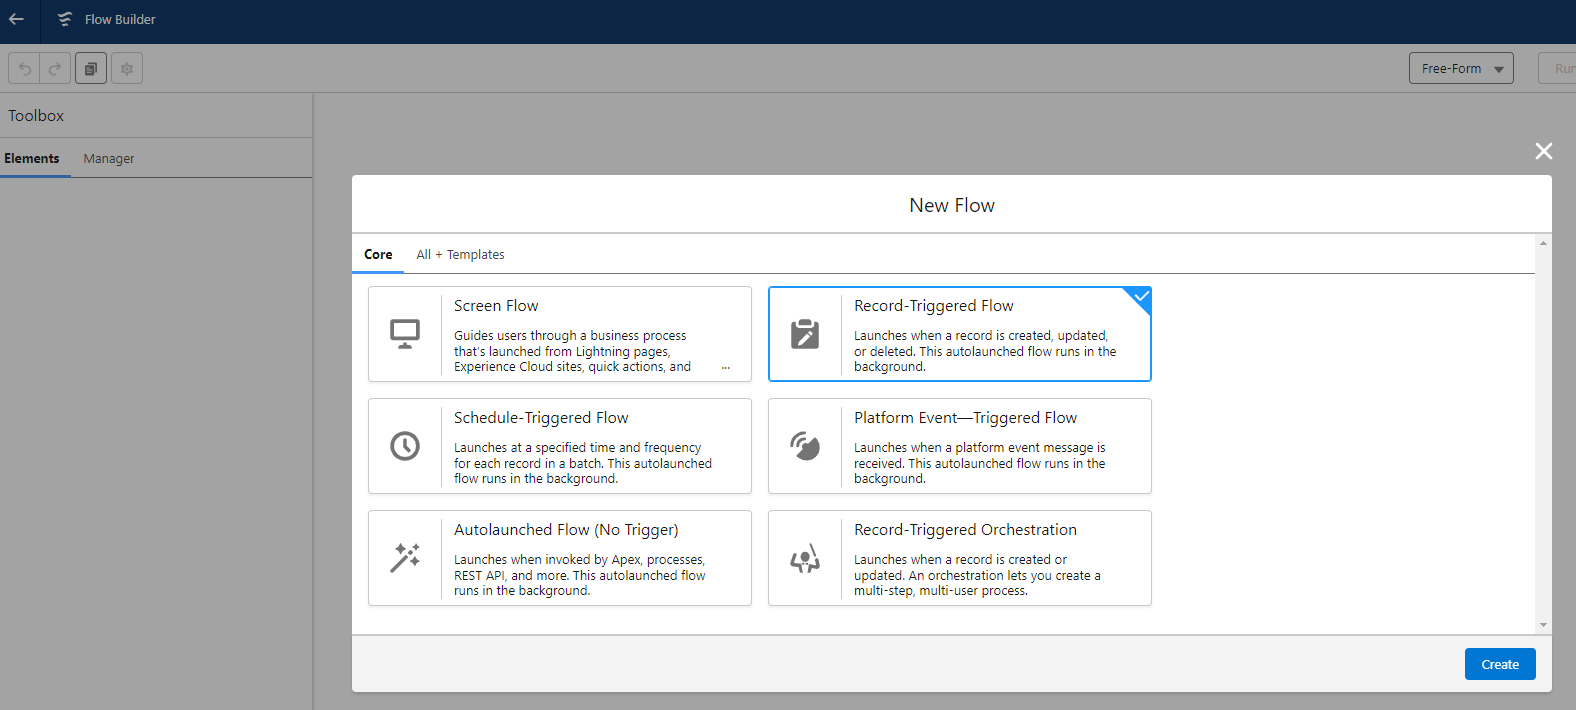
As you can see there are a number of flow options to choose from and we won’t go into the definition of each in this post. However, if you are interested in learning more here is a great resource from Salesforce.
For this example, we want the flow to trigger when a campaign member record is created, regardless of campaign member status so we will choose the ‘Record Triggered Flow.
- This should only trigger for a created record, not every time a campaign member record is updated.
- The reason is that we want to capture the custom field data at the time the person became a campaign member
- If we trigger the flow to run on updates, then the data in the custom fields will overwrite with the most recent data.
 Click create to move to the next screen.
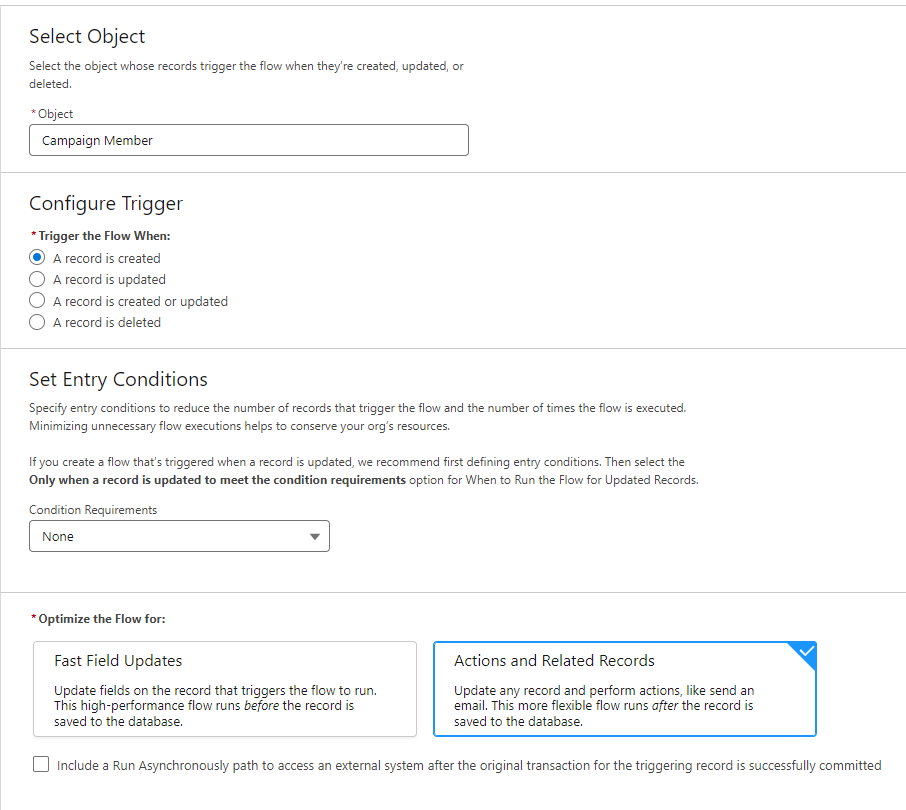
On the next screen you will determine which object this flow will trigger the flow. For this example, it will be the campaign member and only when a record is created. If you had entry conditions you could specify what those were. This essentially allows you to exclude or include only certain campaign member records based on certain criteria. At the bottom of the screen you will need to determine if you want to optimize the flow for ‘Fast Field Updates’ or ‘Actions and Related Records’. For this example we are using the ‘Actions and Related Records’ option because the ‘Fast Field Updates’ action will run before the record is saved, making it fast and efficient but not ideal for this use case. We need to make updates to both the triggering campaign member record AND the related lead/contact record. Based on that requirement we will need to use the ‘Actions and Related Records’ option.
Click save.
Next we need to build a decision into our flow to determine if the campaign member record being created is from a lead or contact. To do this, click on the plus sign to ‘add element’ and choose ‘decision’ under the logic section.
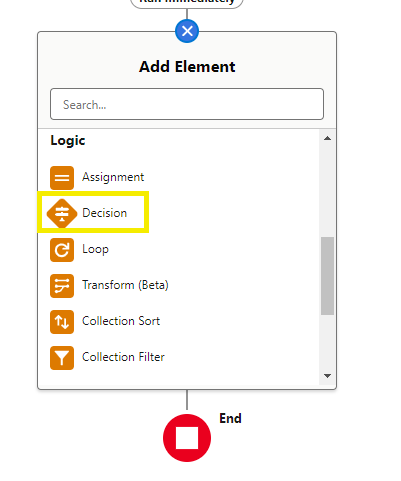
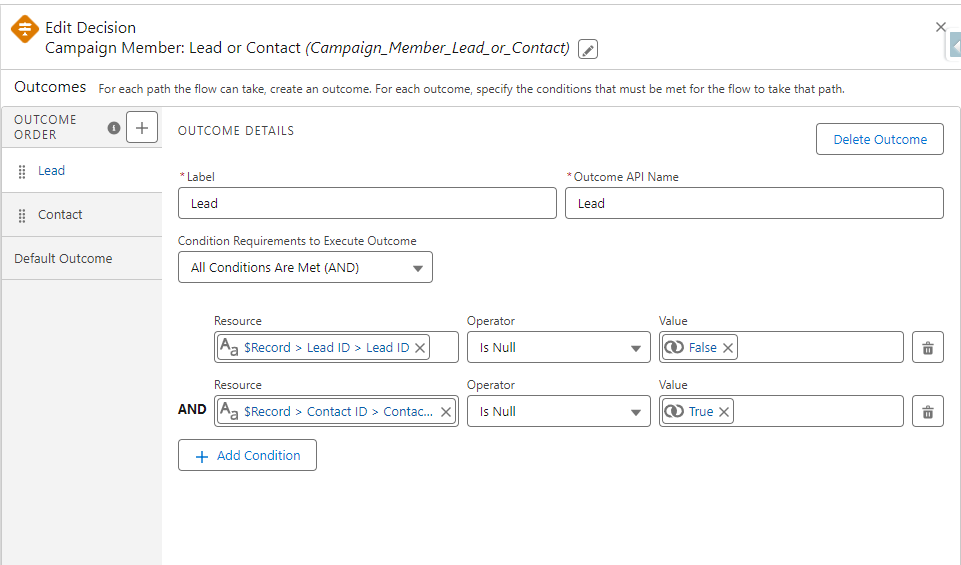
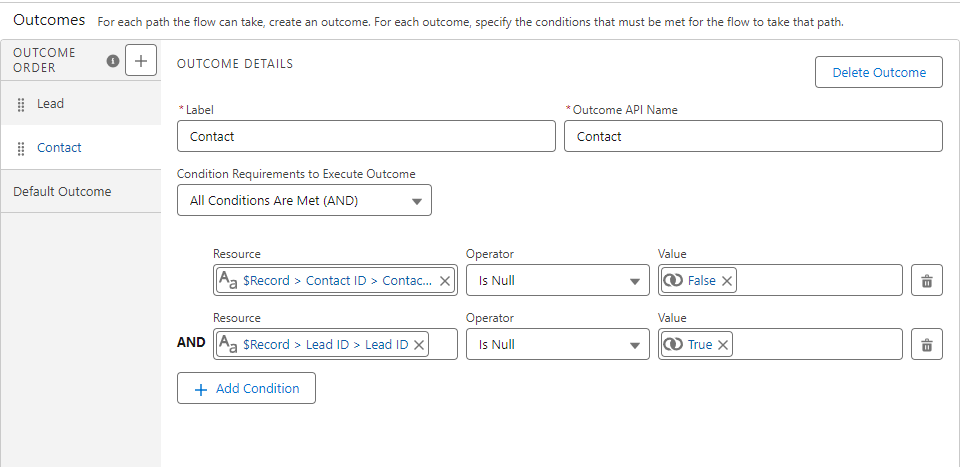
These images show the process of selecting Decision, and then determining the outcomes for Lead and Contact records.
Within the decision element, you will need to create two paths for the record to follow based on meeting the criteria defined for lead or contact. The reason for this is that we need to tell the flow which record to pull the field data from in order to populate the campaign member fields. Once the decision criteria is completed, click the plus sign on the lead outcome and choose ‘edit records’ from the tree.
This is the screen you will tell the flow which fields and values to use to populate the campaign member fields. Because we are on the lead outcome side, we will need to specify that the values be pulled from the lead record that triggered the flow. You can see below that we have specified the record > leadid > field name. On the contact side you will replicate this step but populate using the contactid > field name.

The last step is to NULL out the triggering record UTM field values.
- This step will NULL out the field on the actual lead or contact record, NOT the campaign member just created.
- We don’t want to preserve historical data and risk populating the fields with old data when that same lead or contact is created as a new campaign member in a new campaign.
- To do this, click on the plus sign again and choose ‘update records’.
- In this screen you will choose ‘Specify conditions to identify records and set set fields individually.’
- This is required as we need to specify the specific lead (using the leadid match) that the flow needs to NULL values.


In this example, we had a set of fields called ‘Last UTMs’ on both the lead and contact that we are using to populate the campaign member fields and NULL out in this flow. You can use whatever fields you have created in your instance that make the most sense!
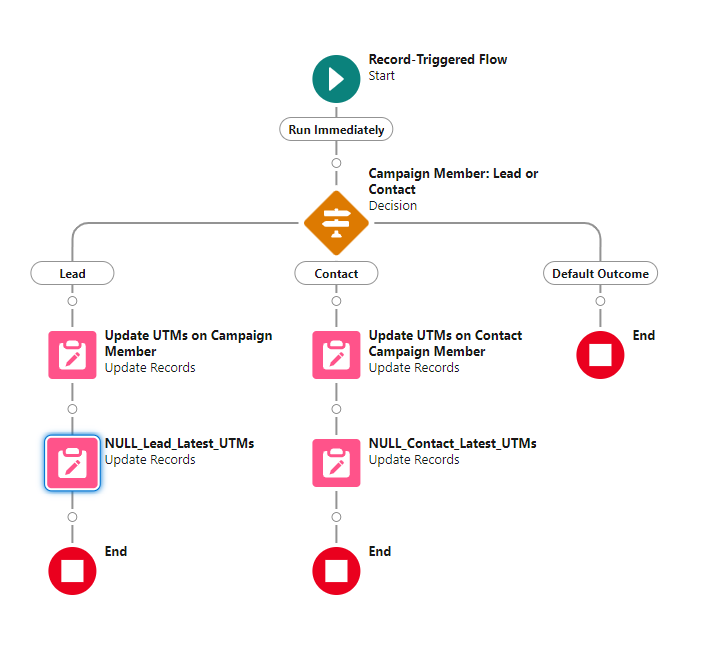
Here is the final flow:
A final option for this flow is to add an error alert on the default outcome. This email alert could alert a user if a record fails to trigger this flow. This shouldn’t happen but just in case. Click on ‘Activate’ when you are ready to activate this flow.
Congratulations, you have built your first flow!
Reporting: Custom Campaign Member Fields
Once this flow is activated and running, you can use Salesforce reports to view the data. Navigate to the reports tab and click on the report ‘Campaigns with Campaign Members’ option. Add your custom campaign member fields as columns in your report to see the data!

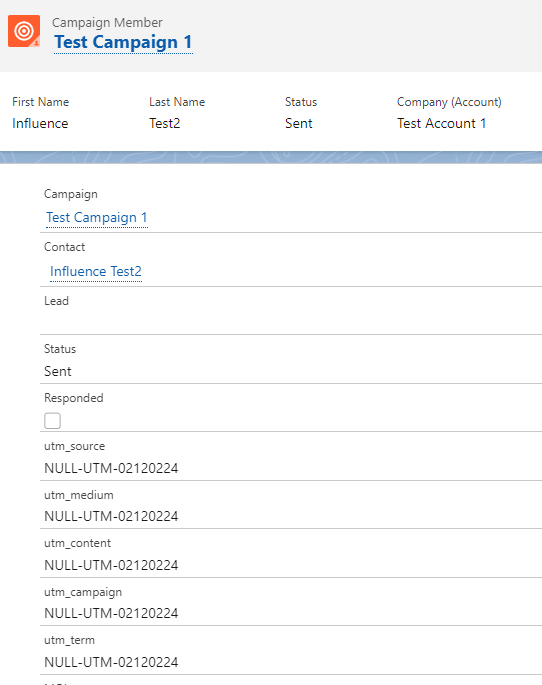
You can also view these on the individual campaign member record:
Summary
By leveraging Salesforce automation, you can capture custom information on the campaign member records to understand which channels and tactics are driving engagement. In addition, this removes the need to build out multiple campaigns for the same offer and manage campaign membership by field data.
Happy building!